Tag: Manage disks
Usual workflow of the software developer or DevOps engineer contain testing of the completed task on local virtualised environment before sending completed work to repository or share with his team member. In windows environment Hyper-V is default virtualisation solution. In my experience, in some situations, allocated virtual hard drive just running out of free space and complete task become difficult. It is adding extra work to look around and find some additional resources. For simplifying this task I have developed work flow with storing set of the created machines to external SSD drive for the time when those machines are not required. And use local computer hard drive only for VMs currently in work and actively used.
As VM being reused sometime appear issue with virtual drive on those vms running out of free space. It may occur during long time usage of the VM or just because virtual drive required size was not predicted correctly or just because local resources is tiny.
This situation may be easily resolved by extending virtual hard drive.
It will take 2 simple steps to extend virtual drive size in Hyper-V:
Step 1. Hyper-V VM configuration
Virtual machine should be powered off. Shutdown VM from OS or by clicking on “Shutdown”.
Move to next step when state of the Virtual machine is “Off”

Open virtual machine settings and select Hard Drive from left side list of all devices:

Click on Edit button after drive is selected.
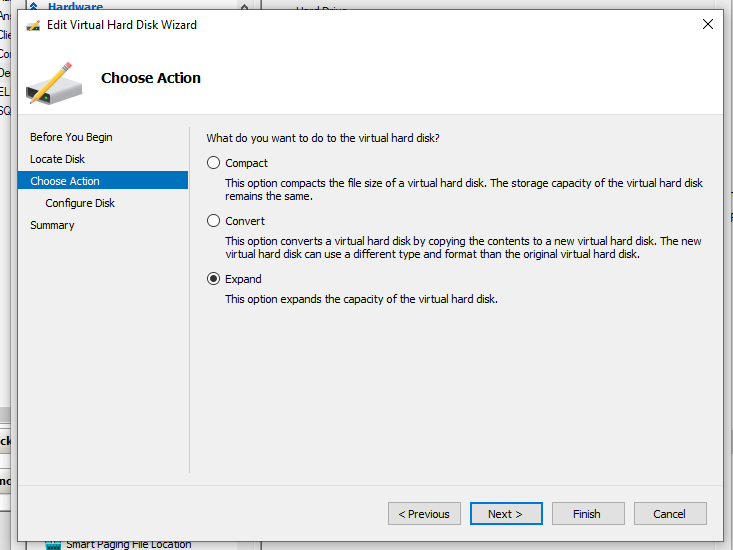
Select “Expand” radio-button and click “Next” to move to next hard disk extension wizard drive

In text field “New size” should be possible to put desired size. This size should be higher number from current. In example we have disk size 120 Gb and extending it to 140 Gb.
At this point you may click “Next” to see summary or “Finish” to accept current changes and close hard drive extension wizard.
After changes applied close setting for this VM and start this VM.
Step 2. Virtual Machine Windows operation system – extend volume.
Once machine is powered on and running login to that VM. Make sure your account have elevated permissions as this step require administrative rights to be completed successfully.
Once you logged in to machine check current disk size it still will unchanged from previously allocated. In our example it is 120 Gb.
As just changing size on virtual drive settings will be not visible for virtual machine operation system, additional steps should be performed with Disc Manager to extend volume.
Open Computer Management and in left side section select Disk Management under Storage section:

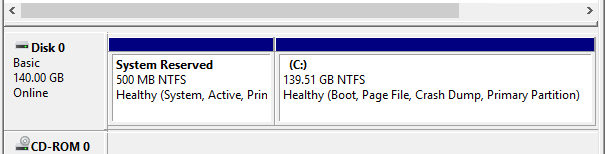
Select disk which has been extended via Hyper-V manager.
You should see disk volume size plus extended Unallocated disk space. In example above it is current disk C: size 120 Gb and 20 Gb Unallocated space, which we added in Hyper-V Settings. (Step 1)
To make extended disk space usable right click on that volume and in options menu select option “Extend volume…”

Extend Volume Wizard will be loaded and moving to next section you will be given option “Select the amount of space in MB” can be added to selected volume.
After clicking “Next” summary screen will be loaded and to complete this operation click “Finish”.
Operation will be performed almost immediately and new size will be showed on Disk Management section:
Disk utility should automatically add extra space to your current volume.
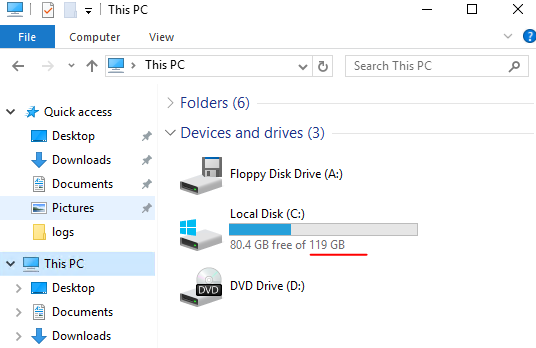
To check if space recognised correctly check disk size in file explorer:

Do not format this disk as it will destroy all your data currently saved to this volume.